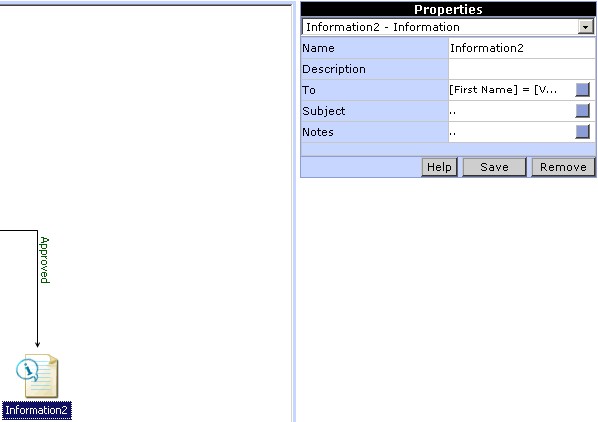
Property settings for Approval
To add an information action to the workflow click on the Information button in the toolbox. An icon for the Information action will be added in the Design Area. The action can be linked with the workflow by clicking on the Link button in the toolbox. To set the properties for the Information action click on the Information icon in the Design Area. The properties corresponding to the Information action will be displayed in the Properties pane of the Process Designer.
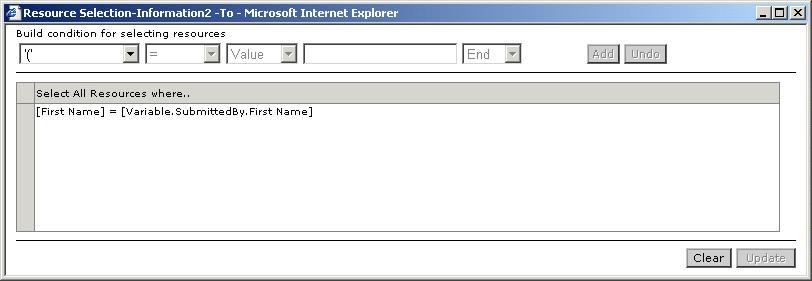
To select the resources to whom this information is to be sent, click on the button for the 'To' property. A window pops up (Fig 2.), in which the resources can be selected. An expression can be built to select the resources based on the resource properties. Select a property from the list, then select the operator, type of value (Value, Variable, Content), corresponding value for the property and the logical operator. Add the condition to the expression by clicking the Add button. To end the expression select the 'End' instead of a logical operator. To remove a condition already added to the expression, click the Undo button. After building the expression, click the Update button
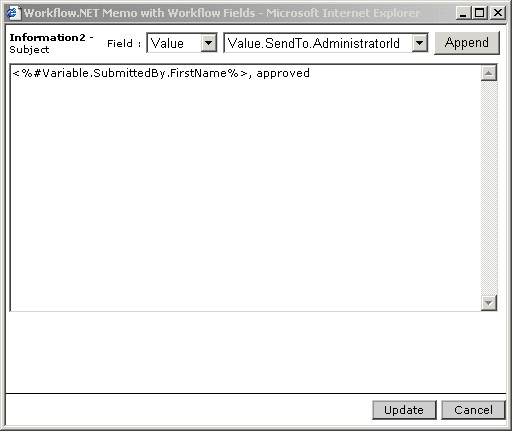
The subject of the information can be customized. To prepare the Information subject, click on the button for the 'Subject' property. A window pops (Fig 3.) up, where the subject can be typed and customized by appending the resource property values. Click the Update button to save the subject.
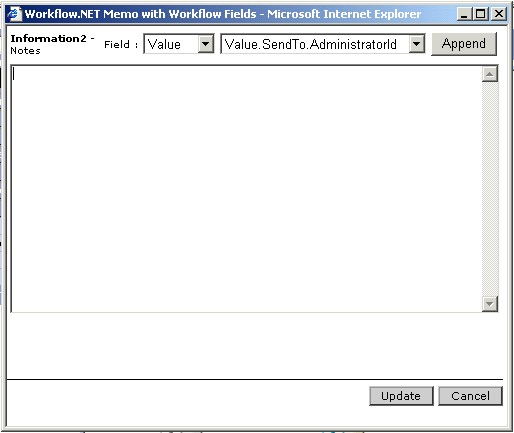
Notes is the content of the information. To prepare the notes, click on the button for the 'Notes' property. A window pops (Fig 4.) up where the notes can be typed and customized by appending the resource property values. Click the Update button to save the notes.