The Notification Action is incorporated in the Skelta
Workflow.NET workflow process design to send notifications to resources, in the
form of email, IM messages, and SMS. The messages can be customized for each
resource by appending the resource properties to the message. The IM messages
can be sent to any type of Instant Messenger service that the configured
'jabber' server supports. A new 'jabber' account can also be created with this
action, if no account is available. Services or agents can be registered, to be
able to send messages to users who use services other than 'jabber'.
The Properties to be set for the Notification
action and the function of the properties are explained in the table below.
|
Property
|
Description
|
|
To
|
The resource(s) to which the information is to be sent.
To select the resource(s) click the button against ‘To’ in the
Properties pane of the Process Designer. In the window that pops up (Fig
2.), build the condition for selecting the resource(s) and click Update.
|
|
Notification Type
|
Notifications can be sent in the form of email, instant
message to an IM client, or SMS to cell phones. The Notification type can be
selected from a dropdown list provided in the Properties
pane. An option 'All' is provided to send messages through all media.
|
|
From Email Address
|
If the Notification type is of the form 'All' or
'Email' then this property must be set. If it is not set, then the email
notifications will not be sent.
|
|
Message
|
This is the actual content of the notification sent to
the resource(s). The notification can be customized for each resource. To
assign the content of the notification, click the ‘Message’ button in the
Properties pane for the Notification action. In the window that pops
up, customize the content by appending the various fields to the notification
message (Fig 3.)
|
|
IM
|
This feature lets the user configure an IM account with
any 'jabber' server (Fig 4.). This account
will be used to send notifications in the form of instant messages. The
'jabber' server host name and the port should be configured in the
Configuration file. The workflow engine should be running for the registration
to happen. To create a 'jabber' account, click on the 'IM' button. A window
pops up with fields for entering the username and the password. After entering
the username and password, click the Register button. If the 'jabber'
account could not be created, an error message is displayed and the user can
try to create an account with a different username. If the registration is
successful, then the user gets a list of all the transport services available
at the 'jabber' service. The user can select any service and register for it,
by entering the credentials (Fig 5.).
|
|
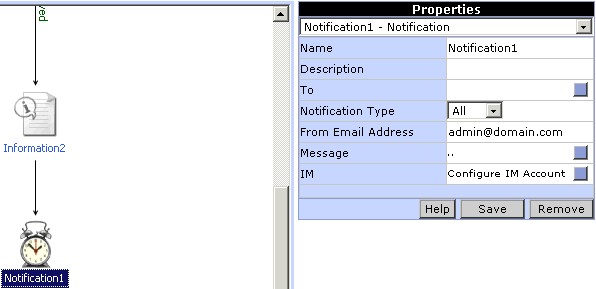
Property settings for Notification
|
To add the Notification action to
the workflow, click on the button for Notification in the Toolbox area. An icon
for notification is added automatically in the Design Area. Link this action
appropriately with the workflow. To set the properties
for notification click on the Notification icon. A list of properties for the
notification action will be displayed in the properties area. Enter an
appropriate description for the notification and set all the properties.
|
|
| Fig 1. Notification properties (Top)
|
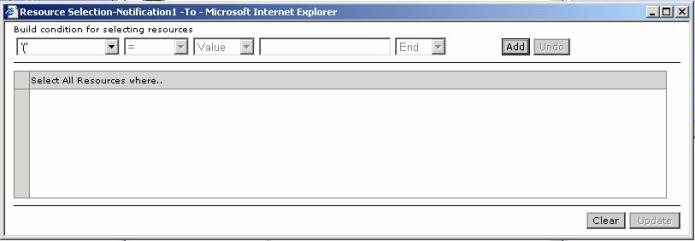
To select the resources to whom this
notification is to be sent, click on the button for the 'To' property. A window
pops up (Fig 2.), in which the resources
can be selected. An expression can be built to select the resources based on
the resource properties. Select a property from the list, then select the
operator, type of value (Value, Variable, Content), corresponding value for the
property and the logical operator. Add the condition to the expression by
clicking the Add button. To end the expression select 'End' instead of a
logical operator. To remove a condition already added to the expression, click
the Undo button. After building the expression, click the Update button.
|
|
| Fig 2. Select resources for notification (Top)
|
The type of notification can be
selected from the drop down list for the 'Notification Type' property in the
Properties pane. Click the Update button to save the
notification type.
|
The notification message can be
customized. To prepare the notification message, click on the button for the
'Message' property. A window pops (Fig 3.)
up, where the message can be typed and customized by appending resource
property values. Click the Update button to save the message.
|

|
| Fig 3. Draft a customized message (Top)
|
|
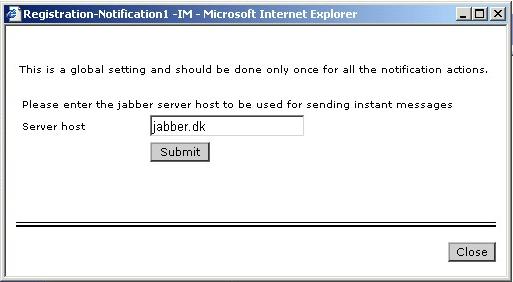
The notification action needs a
'jabber' account to send instant messages. If there is a 'jabber' account
already then it has to be configured in the Configuration file
(WorkflowNET.Config.Xml). To register for a new 'jabber' account, click on the
button against the 'IM' property. A window pops (Fig
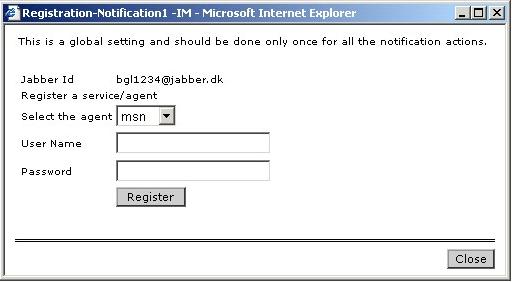
4.) up, which accepts the username and password. After entering the
username and password, when the Register button is clicked, the workflow
engine registers the user with the 'jabber' server. The workflow engine service
should be running. If an error occurs while registering, an error message is
displayed. On successful registration, the service agent registration form (Fig
5.) is displayed with a list of all the agents available. To register
for a service, the type of service has to be selected and the credentials for
that service have to be entered. On click of the Register button, the
service will be registered. After registering the service, the notification
messages can be sent to resources using that service (e.g. Yahoo, MSN, ICQ, AIM
etc.)
|
|
Fig 4. Create a new Jabber account (Top)
|
|
| Fig 5. Registering transport agents (Top)
|